The store will not work correctly when cookies are disabled.
Cookie Preferences
We use cookies and similar technologies to enhance your experience and ensure smooth order processing and to improve our website by analysing visitor behaviour or personalise content and show relevant offers.
Essential cookies are required for the site to function and cannot be disabled. By clicking "Accept" you agree to all cookies, including analytics and marketing. To decline non-essential cookies, click "Decline".
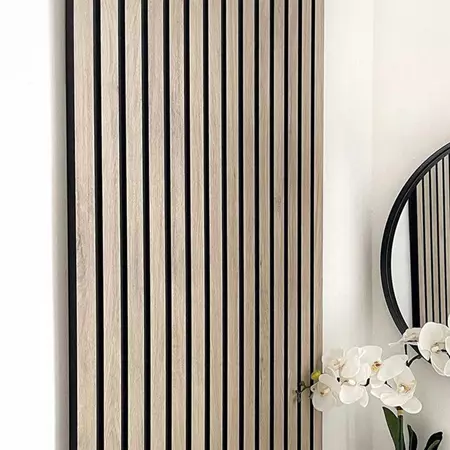
Create beautiful wood walls with our selection of high-quality MDF tongue and groove wall panels. These grooved boards make it easy to achieve the rich, warm look of wood panelling without complex installation. Read More
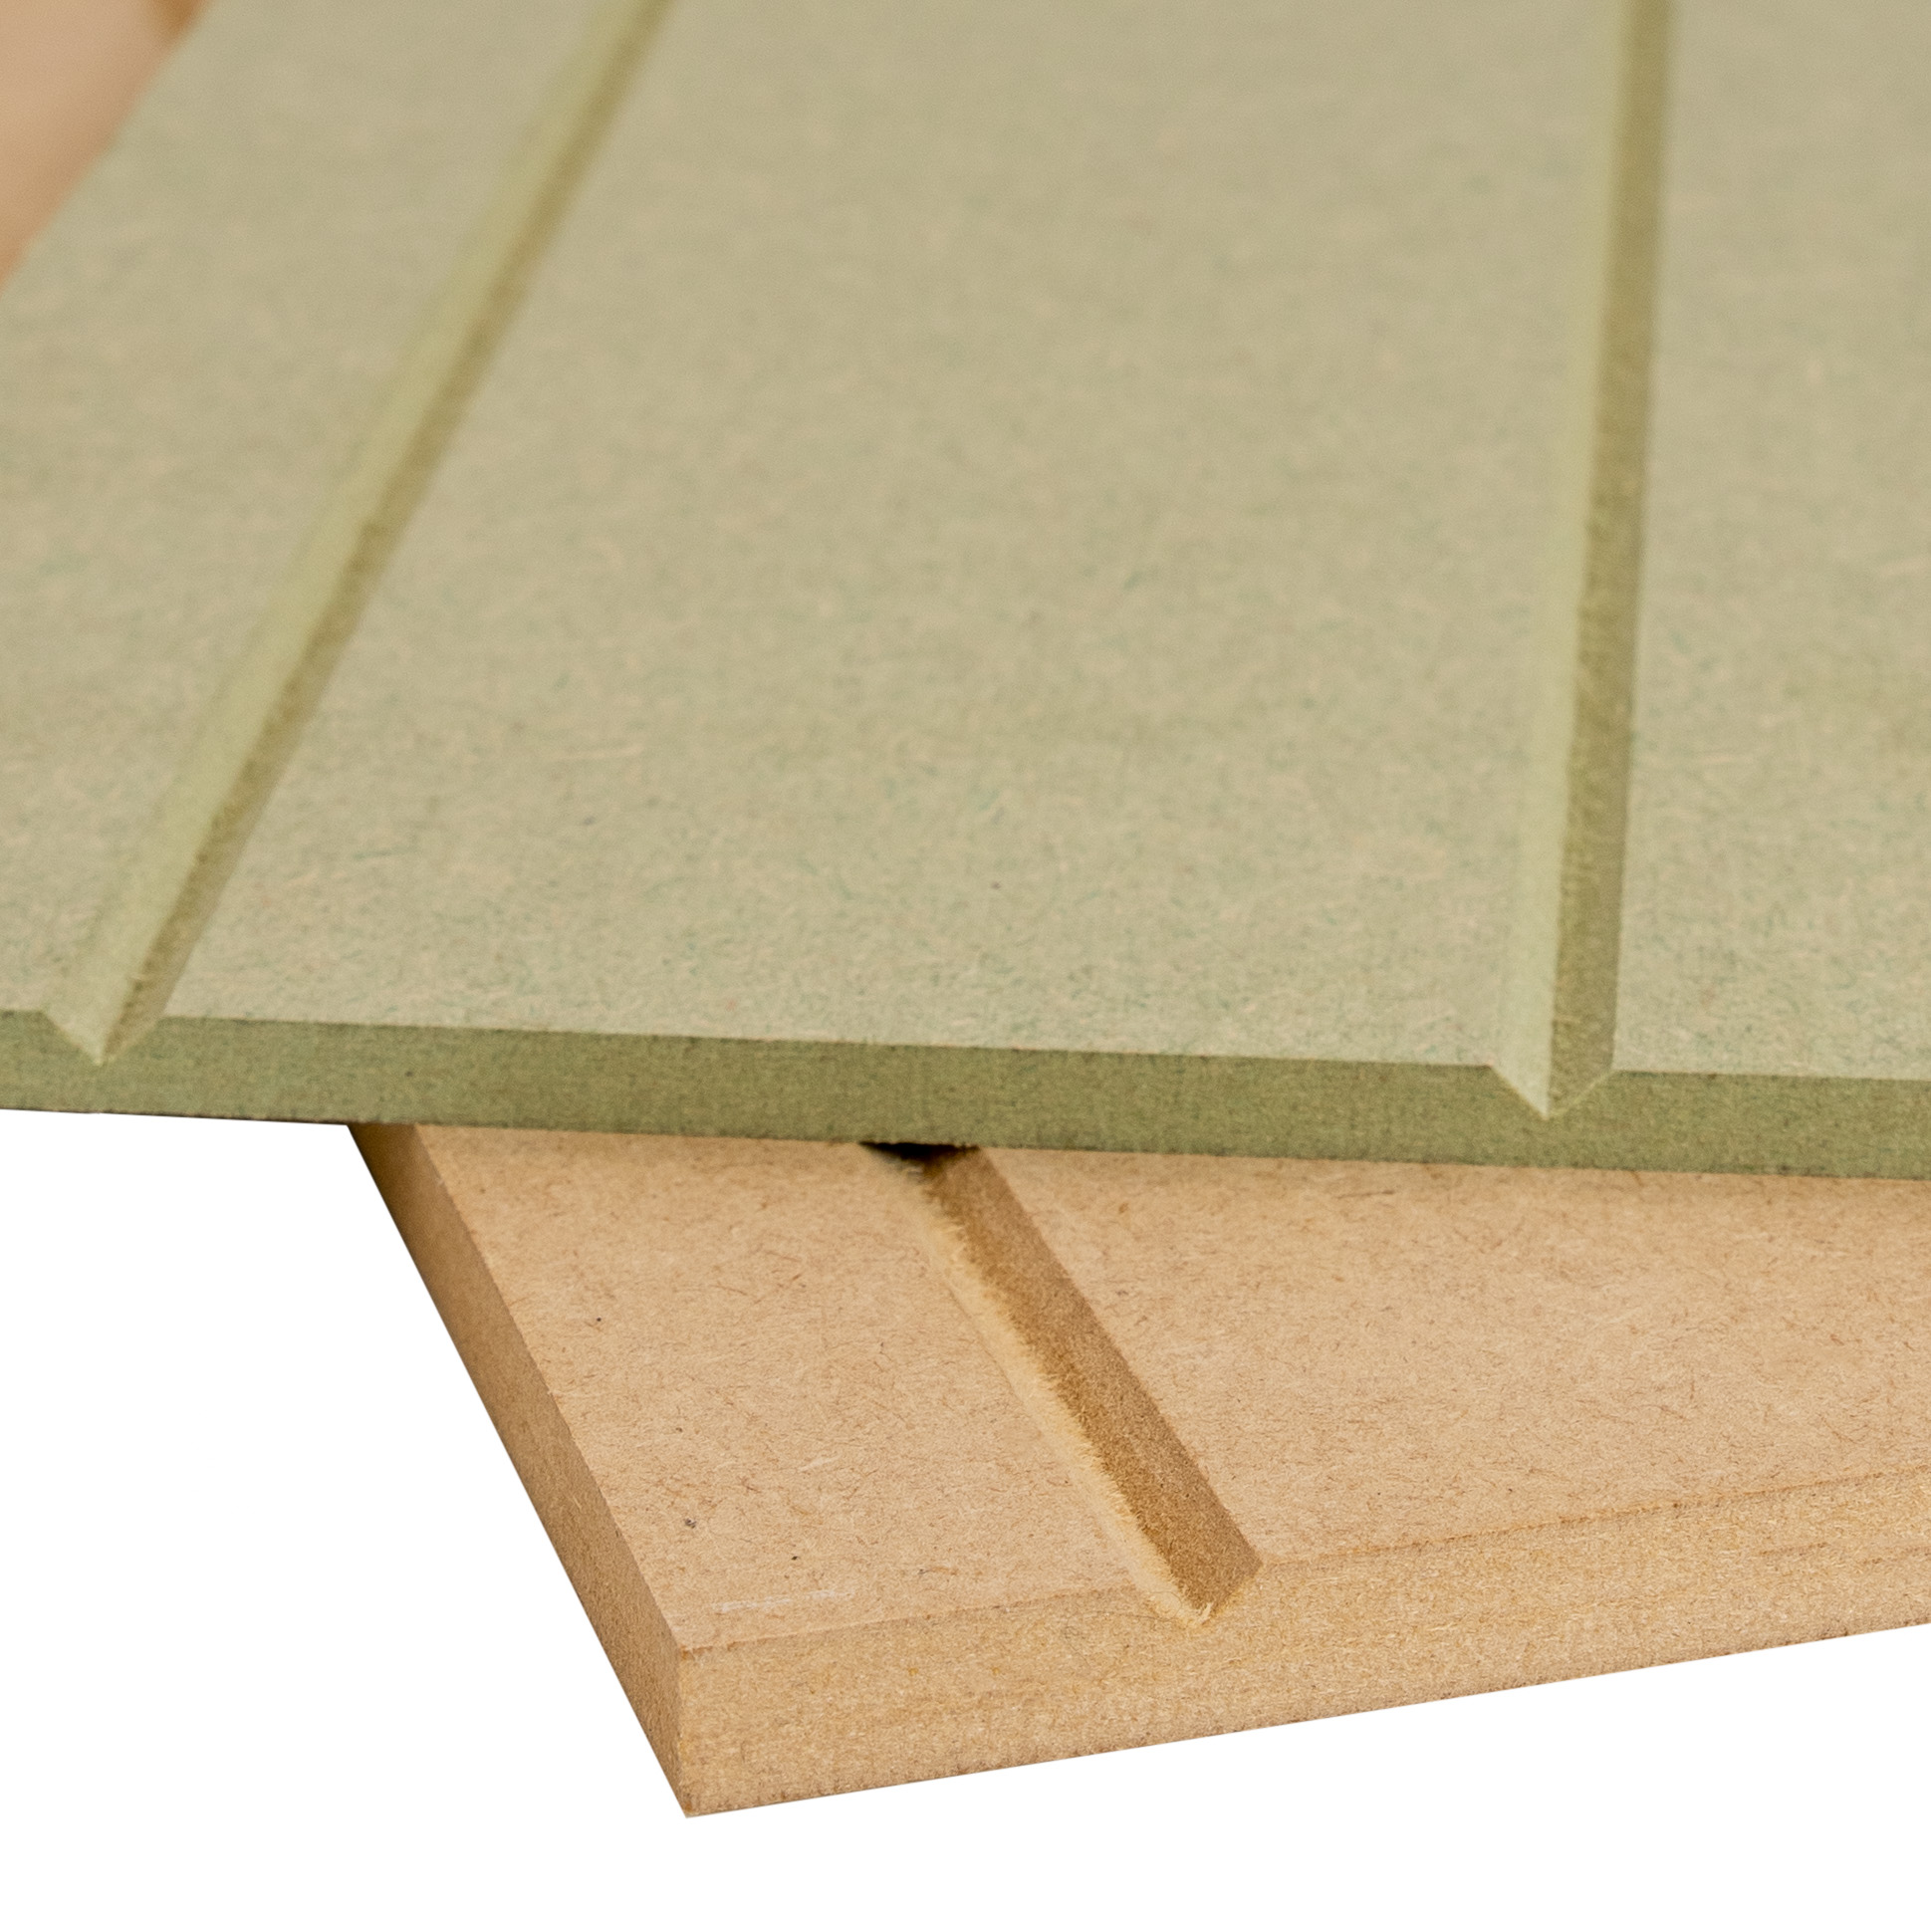
Tongue and groove panelling (commonly referred to as shiplap panelling) features vertical long and narrow v-shaped grooves that run parallel to each other. The grooves are cut into a sheet of MDF by us to imitate wood sheets that have been fitted seamlessly together. Tongue and Groove panelling offers a clean, uniform look with a subtle, linear texture. It is commonly used to create a rustic or Victorian-style ambience, but it can also be employed in modern or transitional designs for a sleek and timeless appeal. It is a popular choice for both residential and commercial applications, providing an elegant finish to any room.
At Cut My, we offer our tongue and groove panelling in both MDF and in Moisture Resistant MDF. Both of which are manufactured and designed to fit your exact needs. The materials are also lightweight, customisable and inexpensive which makes them easy to install. Our Moisture Resistant MDF option is ideal for bathrooms and kitchens where humidity levels can be higher. It is also easier to paint than standard MDF. The nature of shiplap tongue and groove panelling allows homeowners to personalise their panelling by painting them any colour they would like to create their desired effect.
Primarily used as a decorative feature in homes, tongue and groove panelling offers various applications across different areas of the house or in the shed. Its distinguishing feature is the long and narrow v-shaped grooves that create a uniform look with a subtle linear texture. It is a cost-effective option for those who would like to create aesthetically pleasing wall decor that resonates with the latest interior design trends - perfect for your Instagram content!
What sets us apart from other suppliers, is that we offer customisation on all of our products. We provide a kit that is cut to your desired size, ensuring a precise fit for your space. This saves you the hassle of having to cut the wood sheets yourself and creates a much easier installation process. Whether you are a professional tradesman or a keen DIYer, this kit will be ideal for you to transform your home or business! As long as you have the right tools (which you can also buy from us), you will receive everything you need to install your panelling. All of our Wall Panelling Kits come with a physical installation manual with detailed instructions and illustrations.
To further simplify your project, we offer a priming option for our wood sheets. With this option, the panels arrive ready to be painted, saving you valuable time and effort. Whether you have a specific colour scheme in mind or prefer a clean white finish, our primed tongue and groove panels can be easily customised to suit your design preferences. Both types of MDF will need to be primed before painting them a colour of your choice to ensure a clean and professional finish.
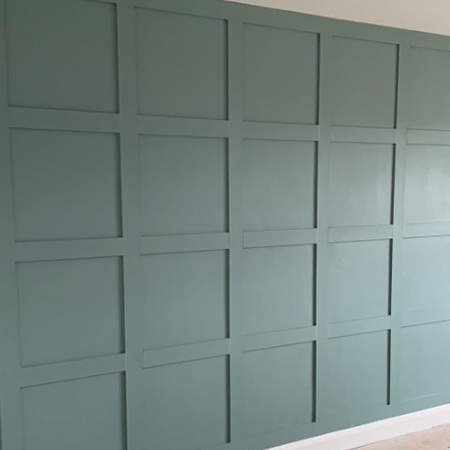
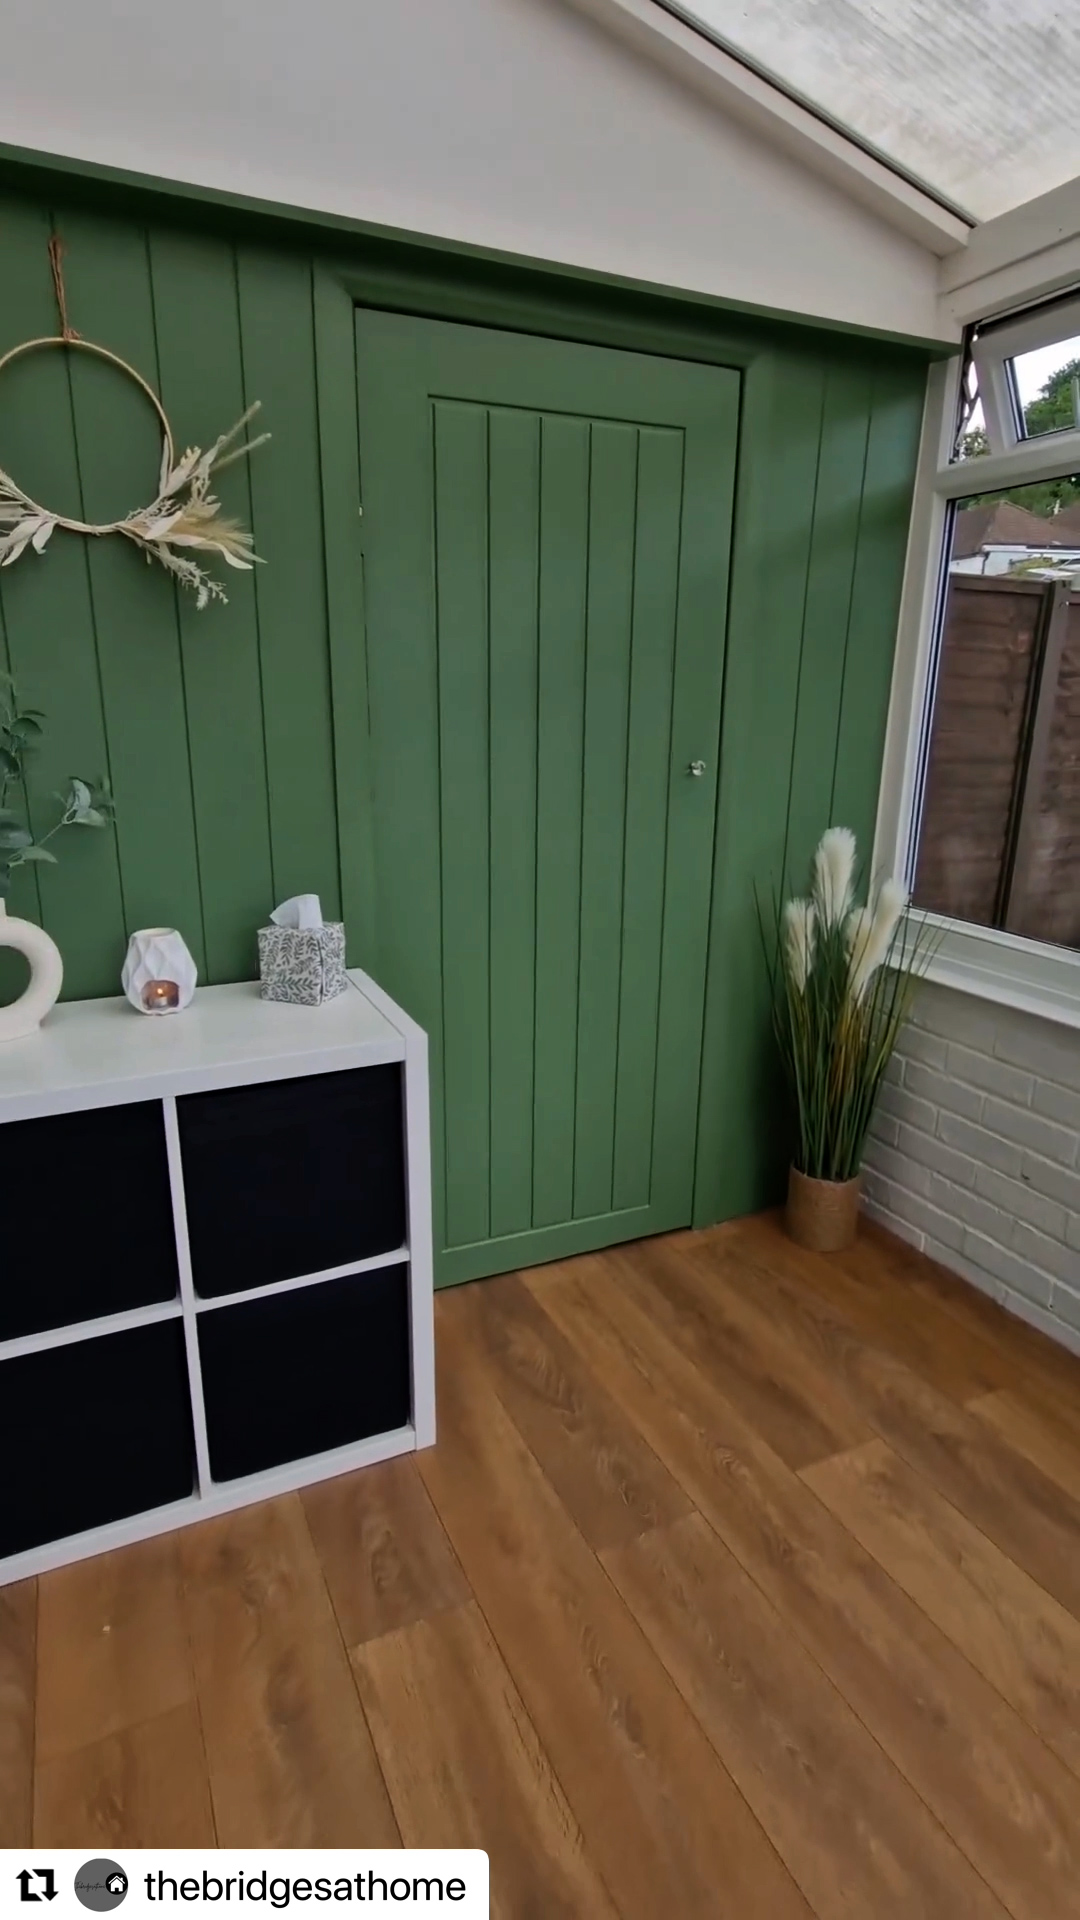
See how @thebridgesathome transformed their conservatory with our V-Groove panelling and 18mm MDF shelf!
Their wall had peeling paint and damage, making it difficult to decorate—so they opted for our made-to-measure V-Groove panels for a seamless, stylish finish. Installed with adhesive and painted in a calming sage green, the result is a beautifully refreshed space with added texture and character.
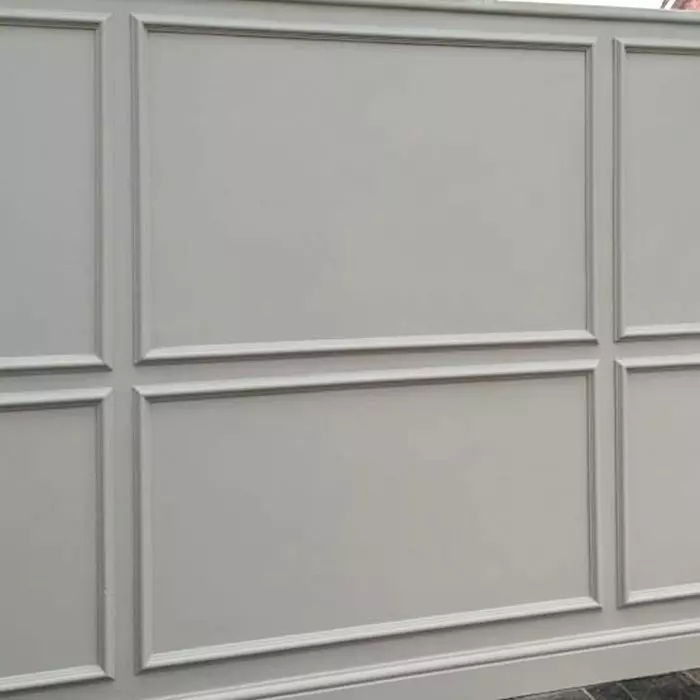
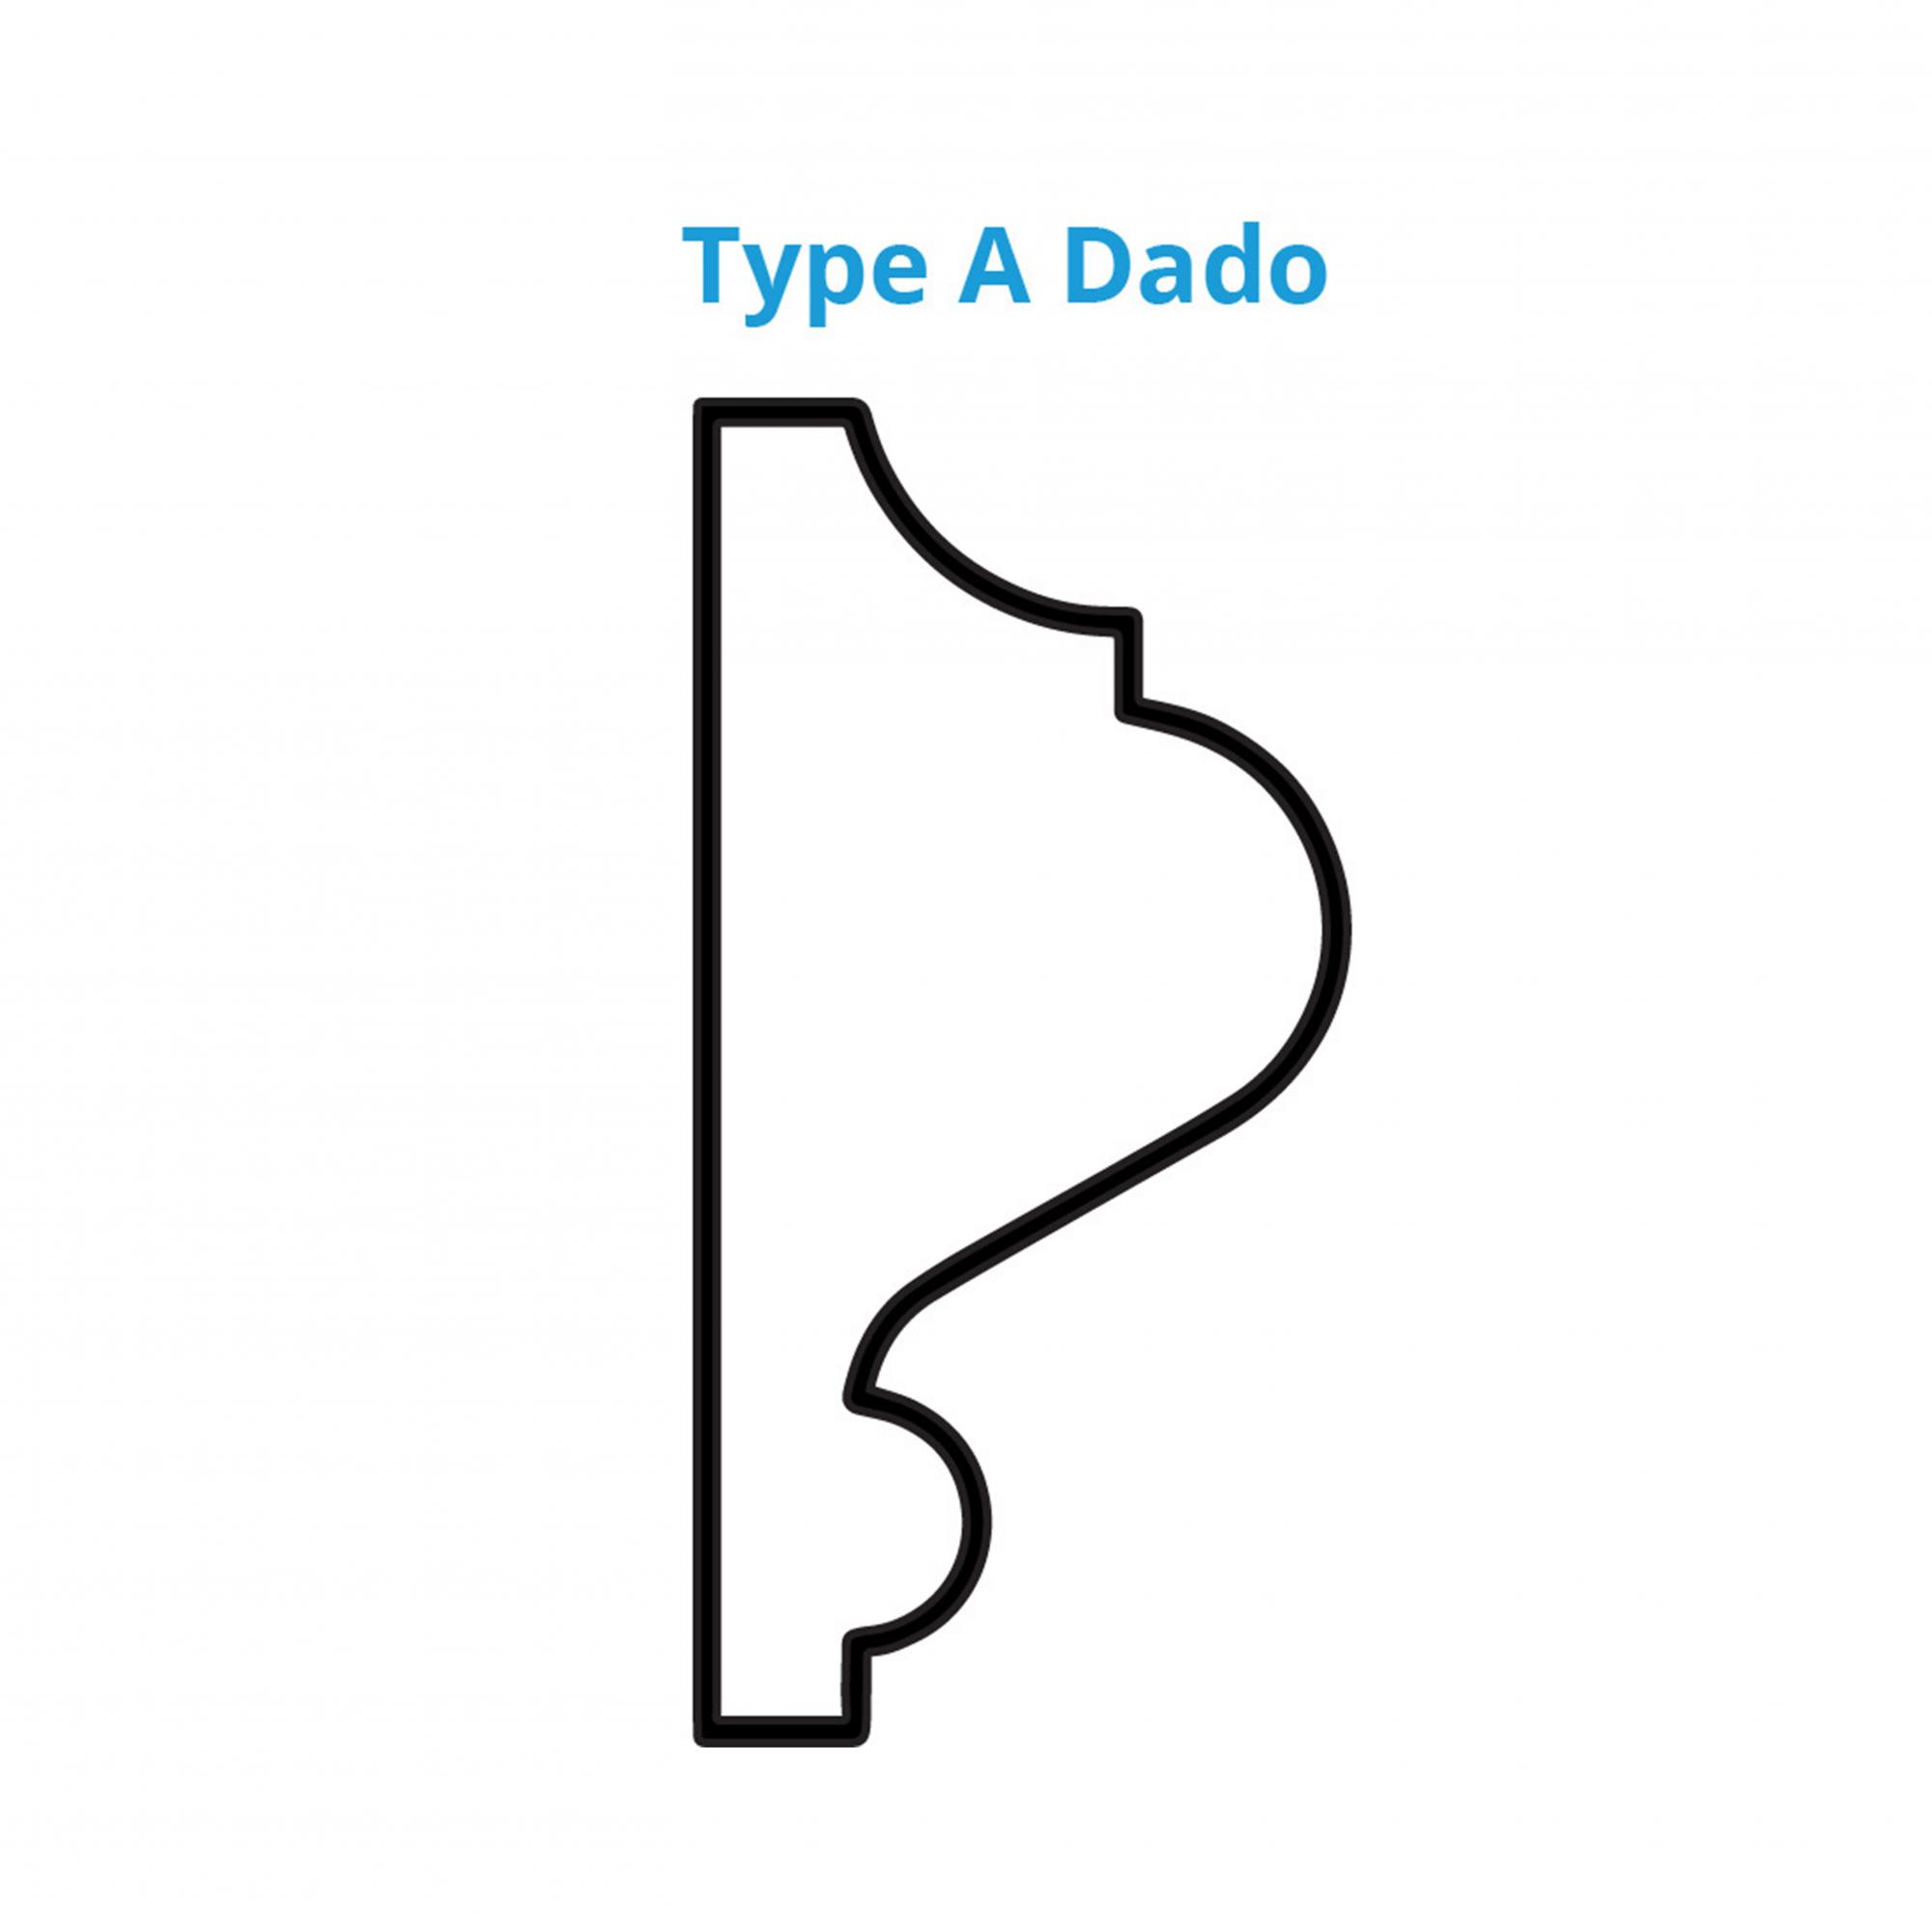
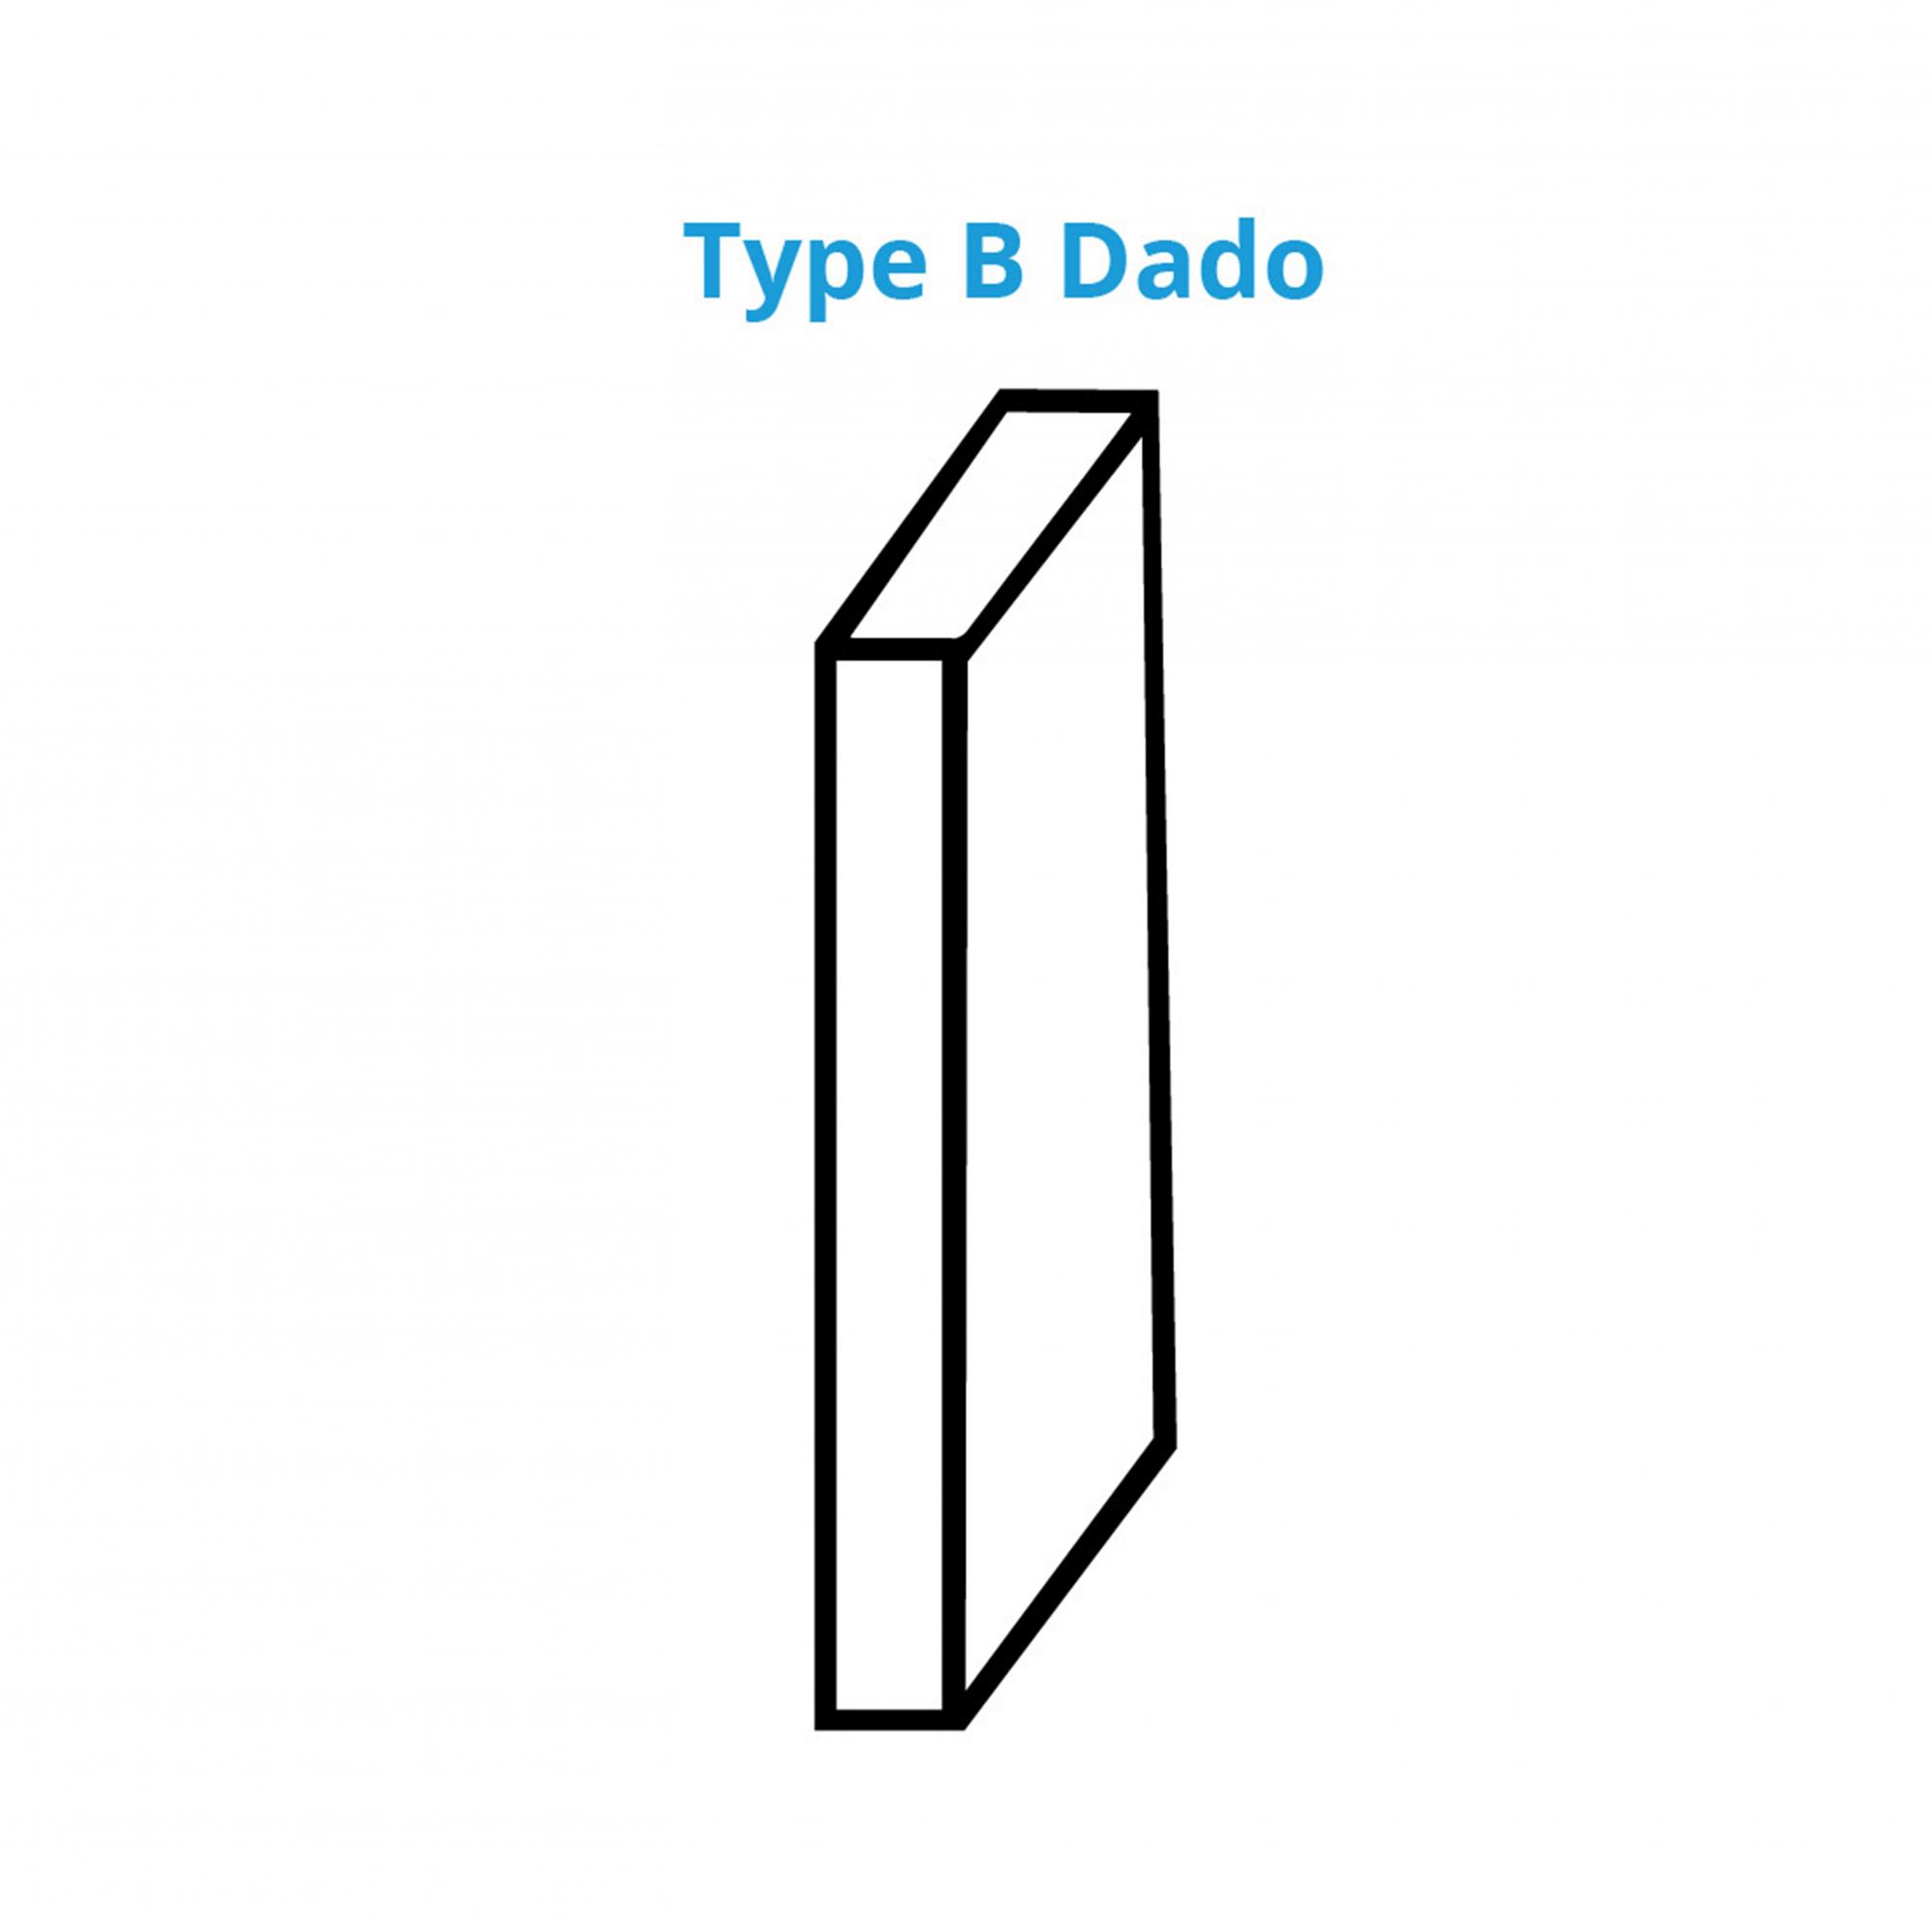
Wainscot Cap
There are plenty of possibilities to be creative with your tongue and groove panelling. At a Custom Height, you also have the option of adding a wainscotting cap which is placed above your V Grove Panelling. We offer two types of Dado Rail, one of which is Type A is a classical moulding style. When you choose our Type B Dado Rail style, the top of your V Groove panels will be chamfered and you will then place a piece of Moisture Resistant MDF (provided) above the panelling. This will create an additional horizontal groove at the top of your panelling. We also provide the option for you to add a Picture Shelf to the top of your V-Groove Panels. This will come at the same width as your Panelling and with triangular blocks which give the shelf some extra support. This comes in two depths of 80mm and 120mm and you can use it to display your favourite home decor!
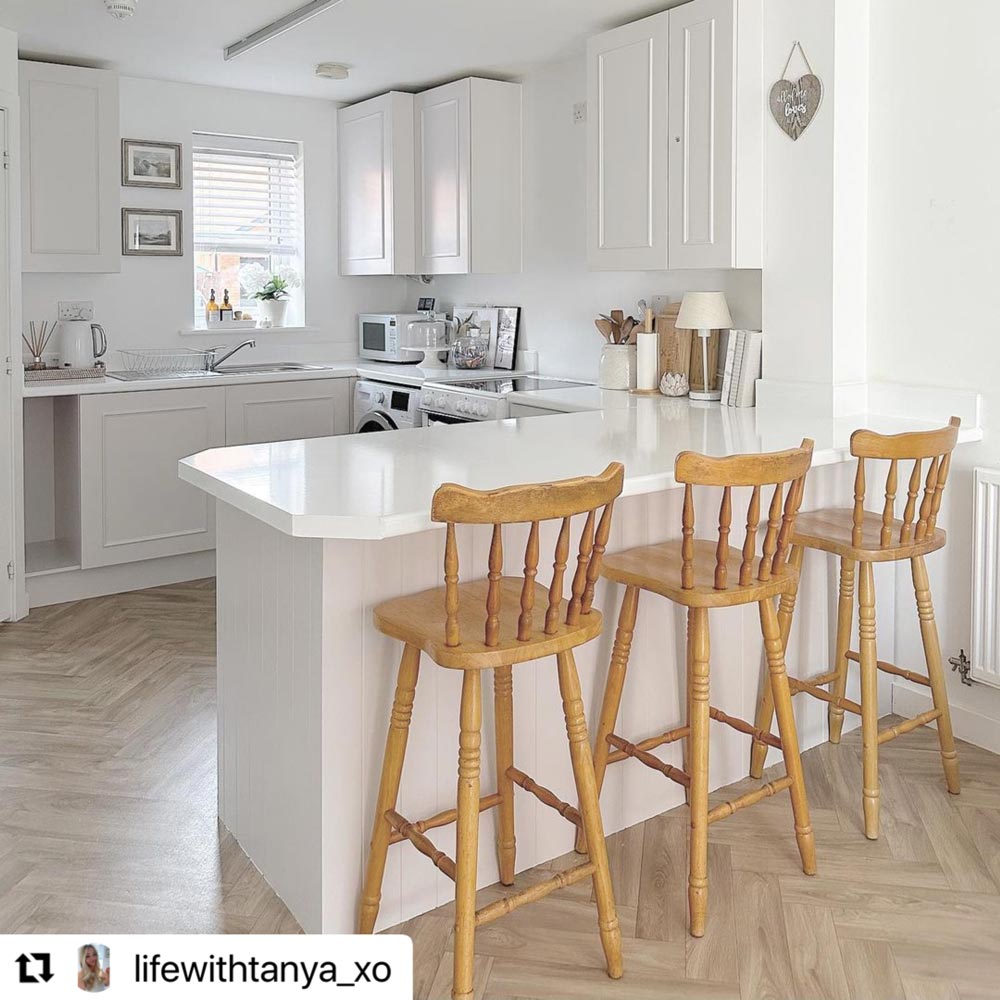
DIY Kitchen Island Makeover | V-Groove Panelling Transformation
Watch as @lifewithtanya_xo transforms her kitchen island with a stunning V-groove panelling makeover! In this video, she demonstrates the simple process of attaching the pre-grooved panels we supplied her to the island using adhesive, followed by painting it in a fresh white colour. The result? A chic and modern kitchen update that adds texture and dimension to the space.
Need some inspiration?
Bedroom
In the bedroom, wooden tongue and groove panelling could be installed at a custom height using a rail cap as a unique-looking headboard. Alternatively, it could also be installed at full height as an accent wall which gives more depth and visual interest to the space.
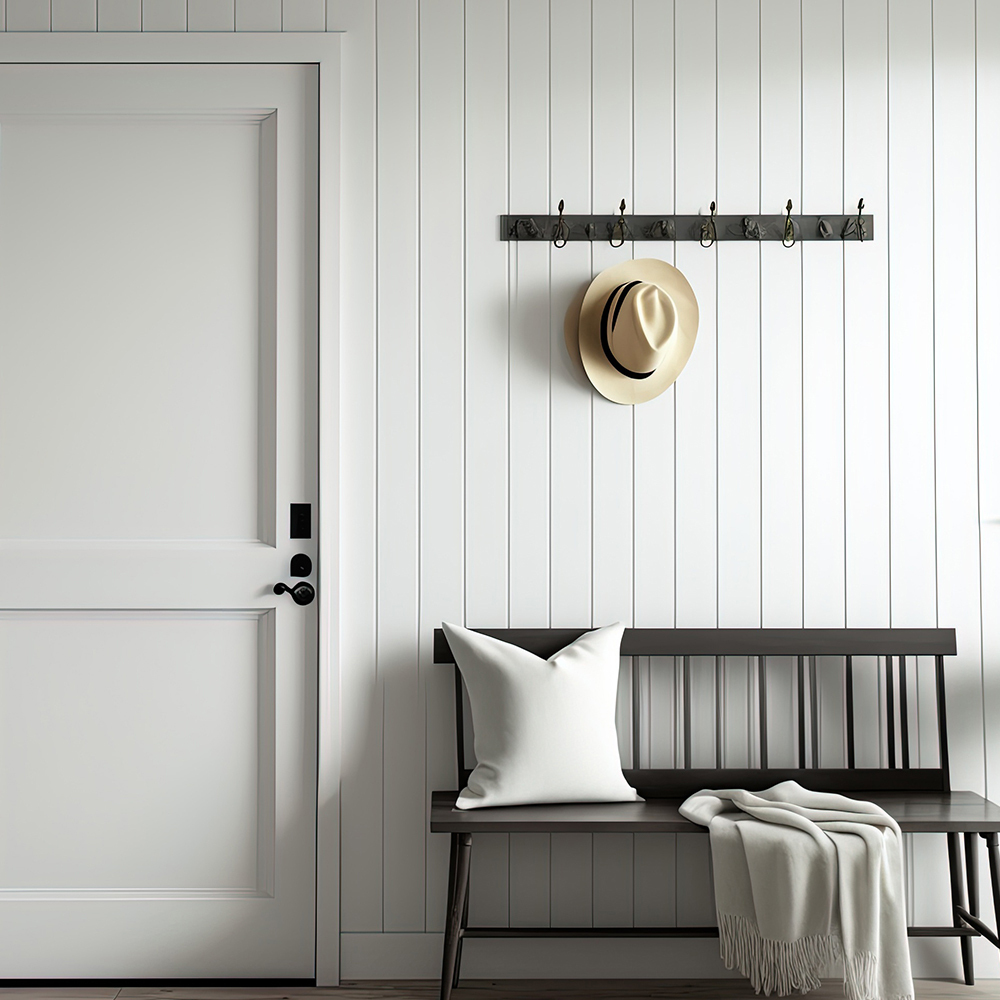
Entry Way
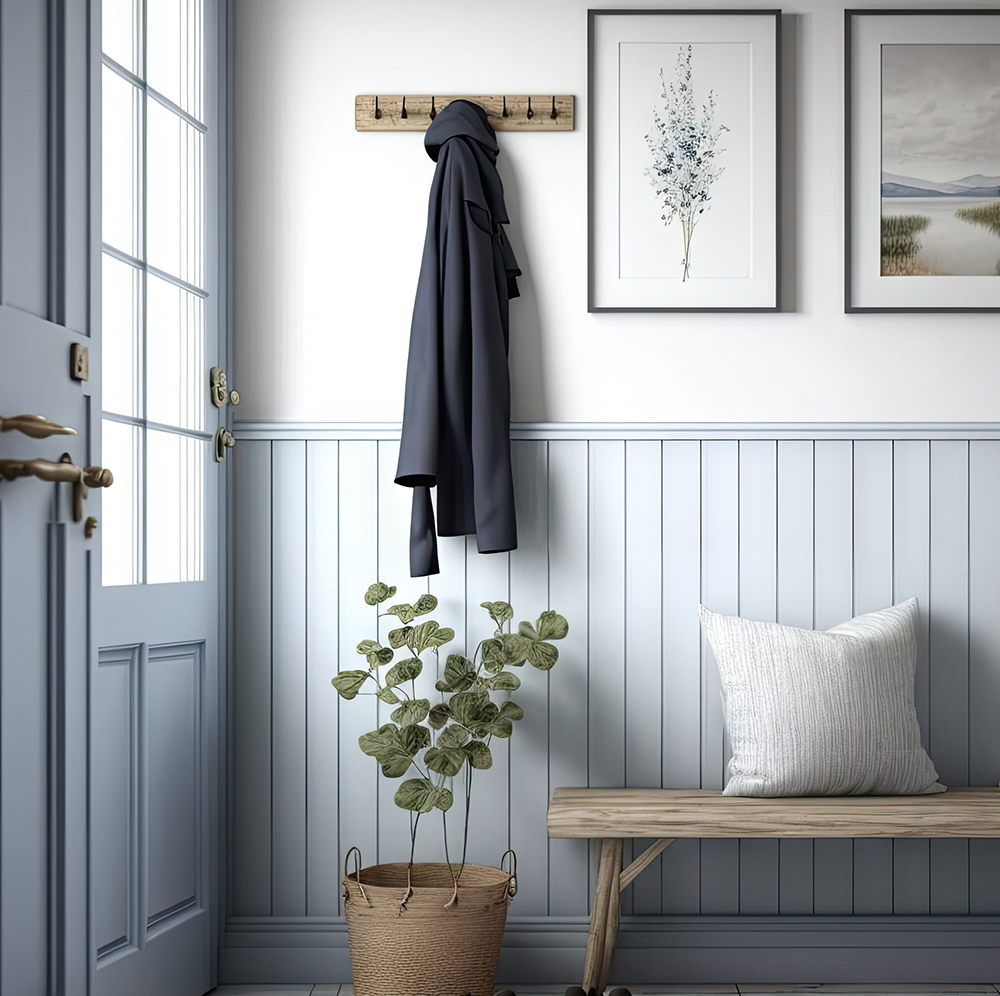
In Entry Ways, such as the porch or just inside the front door, MDF tongue and groove panelling is often installed at custom height, paired with a rail cap or with coat hooks placed above the panelling. This creates a welcoming and organised space whilst incorporating a rustic or coastal aesthetic.
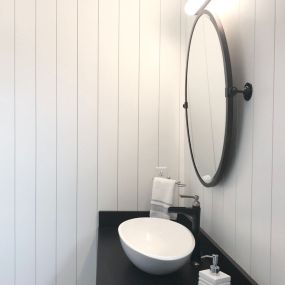
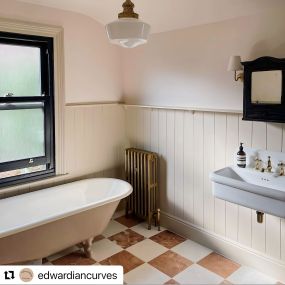
Bathroom
With our moisture-resistant option, you can install your panels in the bathroom and be reassured that their durability will protect your walls. Tongue and groove panelling is a functional and stylish solution when installed at half height with a rail cap. It can also add a striking effect as a full-height accent wall in a bathroom, creating a focal point for the room, or as a shower panel.
Kitchen
Our MDF tongue and groove panelling also suits kitchens well as an accent wall. Our paintable option enables homeowners to choose the colour and style to fit their kitchen design preferences.
Hallway
For hallways, panels are typically installed at full height. Often, hallways are an overlooked space, but our shiplap tongue and groove panelling installed vertically can create an illusion of height and make the area feel more spacious.
Furniture
Beyond walls, tongue and groove panelling can also be used as a decorative element on furniture pieces such as side tables or around a fireplace to add texture and visual interest to your furnishings.
Sheds and Summer Houses
Tongue and groove panelling is not limited just to the home. Your summer house, shed or even garage could benefit from this stylish and practical wall treatment, enhancing the overall aesthetics of the space. Please remember that this product is supposed to be installed inside as it is not weather resistant.
Inspire us!
There are really no interior design limitations when it comes to Tongue and Groove Panelling. We'd love to see what you do with them in your home. Tag @cutmy.uk on Instagram or Facebook. Include before and after photos and you could be featured in our regular Transformation Tuesdays.
Installing Tongue and Groove Panelling
It couldn't be simpler to install your Tongue and Groove panelling. Everything is cut to size for you so all you have to do is apply adhesive and stick to the wall. Here are some simple steps for installation, however, your order will come with a more detailed physical instruction manual to help you out!
If you have a large space to panel, you may have received multiple panels to fit together. You can lay them out on the floor to familiarise yourself with how they will be arranged on the wall.
Step 1: Prep your space
Please ensure your space has a clean, smooth, flat wall before applying your wall panels. Put your Dust Sheets on the floor beneath the wall you are panelling to protect your flooring.
Step 2: Apply to the wall
With your Caulking Gun, apply a snaking line of Adhesive to the back of the panel and adhere it to the wall. Make sure to use a Spirit Level to make sure that it is straight. Then apply pressure as you push the panel board firmly to the wall. If you have multiple panels to put up, repeat this step until all of your panelling is on the wall. We suggest going from left to right.
Step 3: Caulk
Using the Caulking Gun, apply Caulk to the edges of your panels to fill any gaps. If your wall is not completely straight, you may find that your panelling seems to come away from the wall slightly, so caulk can act as a paintable filler. Use a Filling Knife to smooth the Caulk out and wait for it all to dry.
Step 4: Prime and paint
If you have chosen for us to pre-prime your panelling, then now it is ready for you to paint. If not, you will now need to prime your panelling yourself and wait for it to dry before you then paint it. Once everything is dry. You are free to clean up and enjoy your new panelling!
Product arrived on time, was well packed.
Cuts were to exact specifications and fitted perfectly
Thanks
Jon Dowd,
10 hours ago
Verified
Can recommend
Order received very well packaged and in a timely manner, will not hesitate to order again
SDS,
11 hours ago
Verified
Good
The product came quickly and was well packaged and cut to the exact dimensions I ordered. What more could you ask for!
Emma,
12 hours ago
Verified
Nice company and good products
It was so easy to put the measurements in for the AC window vents. The Perspex is great quality, it looks like the vents are floating, it’s so clear.
For some reason I couldn’t pay online, but staff sent me a link to pay, and it didn’t delay my order.
Ruth,
12 hours ago
Verified
Genuinely impressed with this service
Genuinely impressed with this service. Second order with them. Quality of product is good. The saws and cuts they can make are better than I can make as a hobbyist. Excellent packaging too.
Peter,
12 hours ago
Verified
Cut to size absolutely bang on well…
Cut to size absolutely bang on well packed fast delivery pleasure to do business with many thanks
Customer,
14 hours ago
Verified
great communications
great communications
Paul Jeanes,
16 hours ago
Verified
Very impressive service and quality and…
Very impressive service and quality and price, would definitely use again and recommend
Mr Clisse,
17 hours ago
Verified
Have used this company several times
Have used this company several times. The result is always perfect and delivered rapidly.
Customer,
1 day ago
Verified
Convenience and good value.
A convenient way of sourcing over sized panels of marine ply and having them delivered direct to your door.
GFDC,
1 day ago
Verified
Very pleased
Easy site to order from, kept up to date with delivery date/times. Pleased with the item, very well packaged.
Susan Marshall,
1 day ago
Verified
Perfect from ordering to delivery
Perfect from ordering to delivery
Bob,
1 day ago
Verified
The polycarbonate was accurately cut to…
The polycarbonate was accurately cut to size and well packaged.
Diana Bingle,
1 day ago
Verified
Great company.
Great company.
There was an error with the initial order due to a CAD issue which was quickly rectified with a replacement sent within a few days.
Would definitely use again!
Sye,
1 day ago
Verified
Excellent ordering service and delivery…
Excellent ordering service and delivery was all within a week. Product was well wrapped when delivered and fits perfectly. Could not fault anything about this company. Outstanding.
Ellsie Doyle,
1 day ago
Verified
Brilliant solutions for air conditioning
The Plexiglas window cover for our portable air conditioning is so much better than the traditional fabric ones.
It is surprising how much less often the compressor kicks on compared to before and makes you realise how much power was lost to hot air flowing back in before
Andrew,
1 day ago
Verified
Table top (plywood)
Table top was delivered on time. It was cut to the exact measures that were provided.
Antons Ivanovs,
1 day ago
Verified
Great item
Great item. Fast delivery, only down side is one side is sprayed black and as its on glass very easy to scratch. Even the slightest touch marks it. Once fitted its perfect and minor marks can be hidden with a sharpie.
Mr barry hynam,
1 day ago
Verified
OAP DIY
I am an OAP DIYer and even I managed to complete the project with ease - and it looks ok
Jane Emery,
1 day ago
Verified
Excellent service
Excellent service
Terry London,
1 day ago
Verified
Great to deal with
Great to deal with, fast and communicative, and I love the product! Exactly what I hoped for.
Michael Simpson,
1 day ago
Verified
Easy to use self guided service for…
Easy to use self guided service for cutting board to your specific requirements. Prompt cutting and delivery with no issues.
Sharne Dodds,
1 day ago
Verified
Delivered on time always in one piece.
Delivered on time always in one piece.
Kate Heath,
1 day ago
Verified
Brilliant company
Brilliant company, I had some acrylic shelves cut to size for alcove shelves and they look perfect
Customer,
1 day ago
Verified
Really good quick service
Really good quick service
Spoke to customer service as 2 items were missing from the order were quickly dispatched
Best company for cut plastic needs
Janet Shires,
1 day ago
Verified
Great quality
Great quality, fast shipping, excellent packing and instructions! Will definitely use again!
Neira Jones,
2 days ago
Verified
Excellent service
Excellent service
Richard Taee,
2 days ago
Verified
Good value and reliable service.
Good value and reliable service.
Mr Kerton,
3 days ago
Verified
Great service
Great service, got exactly what I wanted. Arrived quickly.
Aoife H,
3 days ago
Verified
cuts were spot on
Arrived quickly, very well protected, and the cuts were spot on — perfect dimensions.
The ordering process was straightforward.
Highly recommended! ????
Kaloyan,
3 days ago
Verified
Easy to order
Easy to order. The flexiglas was cut perfectly to size. One of them arrived damaged. After showing evidence, another one was cut again and sent for free. Very satisfied. Thank you.
May,
3 days ago
Verified
Exaclty as expected
Exaclty as expected, prompt delivery
paula,
3 days ago
Verified
Materials cut very accurately and…
Materials cut very accurately and delivered quickly.
David.,
4 days ago
Verified
Really good decision to ordered it....
The table cover is perfect, looks like glass and is perfect cut. I am really happy about my purchase.
But unfortunately I have never received this dots, I have ordered, so I can not give any review about them....
Marzena Sokolowska,
4 days ago
Verified
Excellent service fantastic products.
Excellent service, first class products. My go to for any project build.
Chris,
4 days ago
Verified
Good value for money
Good value for money
Brinder,
4 days ago
Verified
Excellent service
Excellent service, perfectly cut to my exact measurements. Highly recommend this company.
Kenny Husband,
4 days ago
Verified
Thanks
Good customer service, good value and great quality
Anne Garrigues,
4 days ago
Verified
Totally positive - 11 out of 10 to CutMy & to DX
Our ordered was delivered speedily, and it arrived correctly cut, and well packaged. CutMy went beyond the call of duty, however - I had to telephone to check that the order was correct when it was delivered - it looked too big! CutMy waited while we checked. The order was delivered by DX - again, on this occasion, they went beyond the call of duty - the gentleman delivering this waited while we checked that the order was correct - 10 stars to both CutMy and DX.
Mr S Curtis,
4 days ago
Truly exceptional and would defo…
Truly exceptional and would defo recommend.
Ordered a large piece for breakfast bar but additionally had a choice whether to cut back skirting board for a new unit in kitchen or build a platform to put it on and throw in a home for the robovac underneath. This did mean getting quite a few precise bits to compensate for pipe work sticking out and the skirting board , but what arrived was a joy to unwrap. Really well packed and all pieces had easy peel sticker on with the dimensions.
Very grateful , thanks !
c claxton,
4 days ago
Verified
Pricey ???????? but very nice quality
Pricey ???????? but very nice quality
Mindaugas,
5 days ago
Verified
Great Service
First class service, splashback fitted perfectly and looks great!
allan,
5 days ago
Verified
Great First Impression.
Exactly what i ordered to the millimetre. Arrived in good time and well packaged. Useful website, easy to order proprietary cuts for a range of materials.
Leo Craig,
5 days ago
Verified
Perspex to top furniture
Wanted some clear Perspex to top two bedside tables and a dressing table… this company were excellent!
From cost, to quality, to speedy delivery - all extremely professional.
I would definitely recommend them - thank you!
Linda Perkins,
5 days ago
Verified
Great service
Very good quality boards with good accuracy of sizing.
Some boards damaged in transit with broken corners making them un usable on my project.
James Lynch,
5 days ago
Verified
Great shelves, just like the originals
Really pleased with the service and the products. We needed three extra shelves, of different sizes, for our kitchen cupboards. Submitting the orders was easy and the received products fit perfectly. You can hardly tell the difference between the new and original shelves. The prices were great, too. Very happy to have found this company and would order from them again.
S Banic,
5 days ago
Verified
Super pleased with how easy to order
Super pleased with how easy to order, products are a lovely quality,
Laura Woodison,
5 days ago
Verified
Quality product
Quality product, fast delivery, very happy.
Stephen Cairns ,
5 days ago
Verified
Exactly what I ordered
Exactly what I ordered, thanks.
Delivery on time.
Simon Williams ,
5 days ago
Verified
First class service
First class service, first class product.
Emily Hollebon,
5 days ago
Verified
Great item
Great item, extremely well packaged, quick delivery and cuts were spot on
Stuart,
5 days ago
Verified
The piece arrived well packaged and…
The piece arrived well packaged and looks great!
M Georgeson,
5 days ago
Verified
Great fast service
Great fast service , product arrived damaged through no fault of the company. Replacement sent out immediately . Very professional service .
Jackie Newbury,
5 days ago
Verified
Great service
easy to order, good communication, arrived quickly. Overall a great experience
victoria g,
5 days ago
Verified
Splashback
Ordered for the first time with the measurements and it was an exact fit, material was perfect and updated on the post and arrival
.Angela ,
5 days ago
Verified
Excellent service
Excellent service, the sizes were spot on and delivery was within the expected time frame.
Colin Rackham,
5 days ago
Verified
Exactly what I needed.
Exactly what I needed.
Kevan Purcell,
5 days ago
Verified
I'm so glad I found these guys
I'm so glad I found these guys! What a company! It made it so easy to order exact measurements of cut MDF which, in turn, meant I've been able to build the new display for my little business.
Super easy to order, arrived very well packaged without being OTT and came a few days after I'd placed my order online. I'd happily order again and I've already recommended to others.
Sarah F,
6 days ago
Verified
Got the board i needed fast
Got the board i needed fast and with ease . Finished off my new TV Wall a treat
Shaun McManus,
6 days ago
Verified
Great customer service
Great customer service, simple ordering process, excellent quality product.. outstanding
Stuart Eatock,
6 days ago
Verified
Quality Products
Excellent service and product, Surpassed my expectations.
Robert,
6 days ago
Verified
Wall panels
Ordered from Cut My really good service
no fault at all. Came on time. Really pleased with my wall panels and they looked really nice once I painted them.
VALERIE ICETON,
6 days ago
Verified
Great overall experience
The perspex was cut to specifications and shipping was great.
Lead time and price was also reasonable.
All in all, a good experience.
TW,
6 days ago
Verified
Superb product and professional company
Superb product and professional company
Danny Swift,
6 days ago
Verified
A very good quality work top for a…
A very good quality work top for a small breakfast table in the kitchen, correctly sized backed up with an excellent mail order service
Ian Lewis ,
6 days ago
Verified
Really excellent
Really excellent service. Easy to order and very quick delivery.
Sam Fenson,
6 days ago
Verified
Easy to order & prompt delivery thank…
Easy to order & prompt delivery thank you.
Marie Roberts,
6 days ago
Verified
Very good quality very quick service
Very good quality very quick service
Mehmet ,
6 days ago
Verified
Excellent service and delivery
Excellent service and delivery
Brian T,
6 days ago
Verified
Very happy with quality when buying tabletop…
Very happy with quality when buying online always something you worry about. So can highly recommend and will use again for my larger dining room table.
Well packaged and prompt delivery
R M,
6 days ago
Verified
I could get exactly what I needed and…
I could get exactly what I needed and while it was a little pricey if you just look at what I wanted but compared to buying a router and trying to cut the items myself my order was good value.
Customer,
6 days ago
Verified
Replacing gree house glass
I ordered the perspex to replace sone glass in my greenhouse. It came exactly the right size and fits perfectly. Delivery was quick and price affordable. A great service thank.you.
Louise Woolacott,
6 days ago
Verified
Placed order from website
Placed order from website, everything was smooth they even provided a downloadable curve measurer that was very helpful getting curve cut perfectly to fit my table.
Perfectly packed for a 1.2 mt square peice of perspex,deliver no issues at all kept me informed of delivery day.
Garry Atkinson,
6 days ago
Verified
Good to deal with…
Easy ordering process and good delivery time. Found to always give good and reliable service
mark walton,
6 days ago
I was looking for a specific cut of…
I was looking for a specific cut of hardboard to suit my needs. When I called Cut My they were extremely helpful in every aspect. The items were delivered to high standards and fast service. All staff I spoke to were very kind. Though Molly was exceptionally patient and thorough making sure the measurements were correct after I was unsure. In one word perfection.
Regards Phil
PHIL ,
6 days ago
Verified
Mirrored acrylic
I ordered the 3mm mirrored acylic to replace a small broken mirror for the garden.
It was easy to order, arrived quickly, well packaged and looks great. Plus I was able to cut it to the arch shape I needed.
I was pleased to find the dimensions meant it would qualify for the cheaper postage, otherwise it would have made it expensive for a small item.
MC,
6 days ago
Verified
Your advice to measure and deduct a few…
Your advice to measure and deduct a few millimetres was great, my only issue was the delivery company said would rearrange delivery if nobody home, my wife was at home, I arrived home to find my parcel outside with a note online stating it had been signed for.
Gary,
1 week ago
Verified
Great purchase and great delivery
The Acrylic I ordered was cut to perfection and delivered ahead of time. I would and have recommended CutMy every time ????????
Customer,
1 week ago
Verified
Very good product
Very good product. Very good price.Very swift delivery. Very happy
Nigel Pyman,
1 week ago
Verified
Great service and would buy again
The Plexiglass arrived with some defects which most likely happened during transport. I reached out to the customer service and I got the response really quickly and a new plexiglass was ordered at no cost and delivered to me asap. The 2nd time everything was perfect. Really pleased with the experience and would definitely it from them again.
Mark,
1 week ago
Verified
I needed to replace some doors on a kitchen
I needed to replace some doors on a kitchen where the original supplier had recently gone bust. Cutmy had the right colours and their bespoke service exactly matched my size requirements. The new doors arrived promptly and as specified.
MR RICHARD COLE,
1 week ago
Verified
Great product … marvellous price… super…
Great product … marvellous price… super fast delivery ????????????????????????
Philip Jones,
1 week ago
Verified
quick
quick, easy to order, precise and good value
customer,
1 week ago
Verified
Exactly what I ordered and delivered…
Exactly what I ordered and delivered when it was scheduled, would definitely use this company again
customer,
1 week ago
Verified
So easy to order as everything is set…
So easy to order as everything is set out for you, great price very pleased with my purchase
MRS C A HILL,
1 week ago
Verified
Very pleased with the goods and very…
Very pleased with the goods and very quick delivery.
Chris Norrish,
1 week ago
Verified
Excellent work
Excellent work. Precise to my measurements. And good turn around time.
antonio talora,
1 week ago
Verified
Easy to order the correct size I needed…
Easy to order the correct size I needed and excellent fast delivery
peter mason,
1 week ago
Verified
Great service
Great service, very quick delivery and ordering was simple.
Helen,
1 week ago
Verified
Great service and website experience
Great service and website experience; high quality product, well packed and spot on sizing. Delivery was very held up unfortunately, but that was the only issue.
AMYBAR,
1 week ago
Verified
prompt processing
prompt processing, and postage it arrived better packaged than I expected faultless thank you
TV/Film Production Company,
1 week ago
Verified
Fantastic
Excellent service, fast delivery and perfect size manufacture
Bjorn Thompson,
1 week ago
Verified
Excellent results for bespoke project
Excellent results from an easy to follow website and ordering system, and verification of the order from a trained CAD expert on any details that needed confirmation. Would definitely reccommend this service and the quality of their stock and production for bespoke projects and quick pieces.
James Nevins,
1 week ago
Verified
Great service
Great service, will definitely use these guys again
Kerri G,
1 week ago
Verified
It was a quick service
It was a quick service, my wood came packaged well, there was no damage. I would recommend this company.
Paramjit Kaur,
1 week ago
Verified
Highly recommended
Ordered 18mm plywood panels for my guitar pedalboard build.
My provided .dxf files contained plenty of rounded corners and cut-out sections, all of which were cut perfectly and very neatly, exactly as per spec.
Bit of tear out here and there, and a few voids in the ply, but that's to be expected with this material. Nothing that Ronseal and sandpaper can't fix!
Overall, very happy. Highly recommended.
I was really happy with the quality of the product, fitted perfectly.
Good customer service and arrived quickly. I would recommend. I used for table tops to protect.
Karen Rutherford,
1 week ago
Verified
Excellent service
Excellent service, cut perfectly to size and delivered when promised
David coup,
1 week ago
Verified
Professional company
Professional company
Adam ,
1 week ago
Subscribe to our email newsletter
Sign up here for our occasional email newsletter with new products, design ideas and discounts across our huge and growing range of products. (You can unsubscribe at any time of course.)